Home › Journal › Why Your PMU Brows Changed Colour
Why Your Microblading Went Grey
— And What to Actually Do About ItGrey brows. Orange brows. Brows that looked perfect at six weeks and confusing after a year. Here is the honest explanation — and what your real options are.

One of the most common messages I receive goes something like this: “My brows were perfect at first. Now they’ve gone grey — or orange — and I don’t know why. Did something go wrong?”
The answer is almost always more nuanced than a simple yes or no. As a PMU artist and laser removal specialist, I see colour changes every week. And the truth is — this is often not about bad technique. It is about skin.
Removal is not failure. It is refinement. It is choosing quality over compromise. And the clients who choose it almost always leave looking younger, more natural and more themselves than they have in years.
Why does PMU pigment change colour over time?
PMU pigments are not single-colour — they are a blend of carbon, red and yellow base tones. Over time, different components of that blend break down at different rates. What you are left with depends on your skin chemistry, your lifestyle and how your immune system handles the ink.
When PMU is applied, ink particles are deposited into the dermis — the deeper layer of the skin. Your immune system immediately sends macrophages (specialist immune cells) to engulf the pigment. Because the particles are too large to be broken down, the macrophages hold them in place — and this is what makes PMU semi-permanent.
Over time, these cells die and are replaced by new macrophages that re-capture the pigment. Laser removal works by fragmenting the pigment into particles small enough for the macrophages to carry away via the lymphatic system. The smaller the fragment, the more efficiently the body eliminates it.
Some skins simply hold pigment longer — not because of bad work, but because of individual immune response, skin thickness and sebum production. This is not something any artist can fully predict.
This is one of the most important things I explain to every client before we begin. Pigment behaviour over time is partly down to technique and quality — and partly down to your skin, which is entirely individual. Skin pH, oil production, sun exposure and how quickly your immune system processes pigment all play a role. A great artist manages what they can. The skin does the rest.
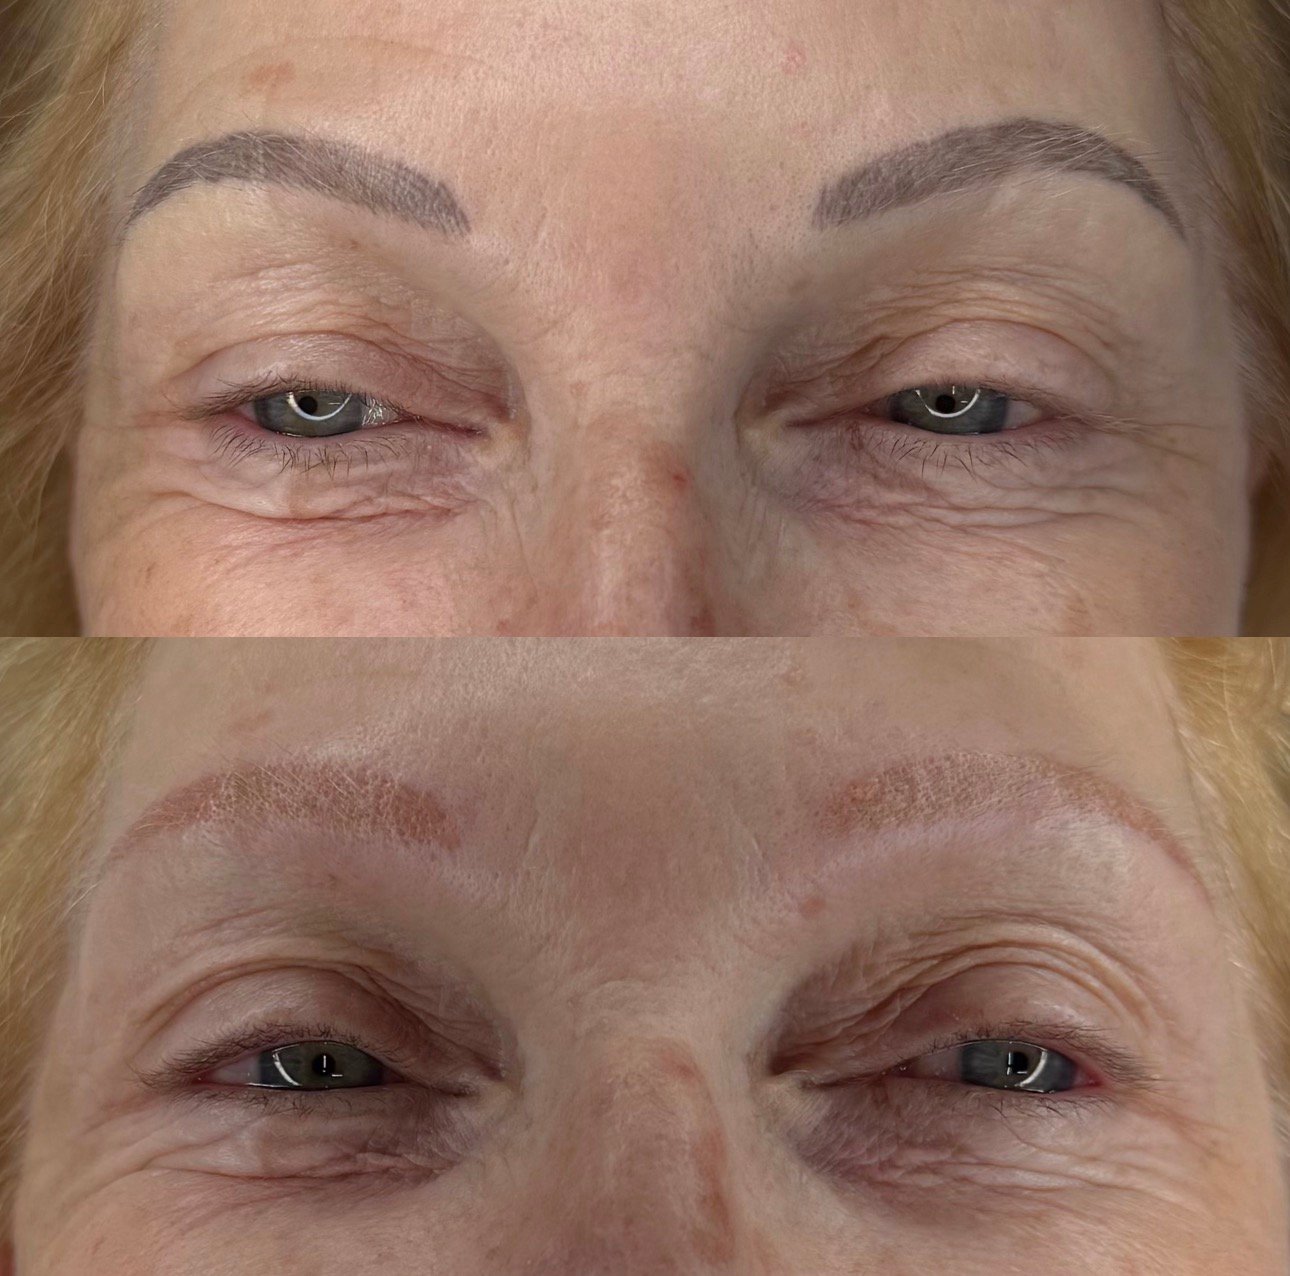
This is one of my own cases. Four removal sessions — a combination of laser and chemical — showing how pigment evolves through the process. Notice how the colour shifts from dark to red tones as the darker carbon pigment breaks down first.
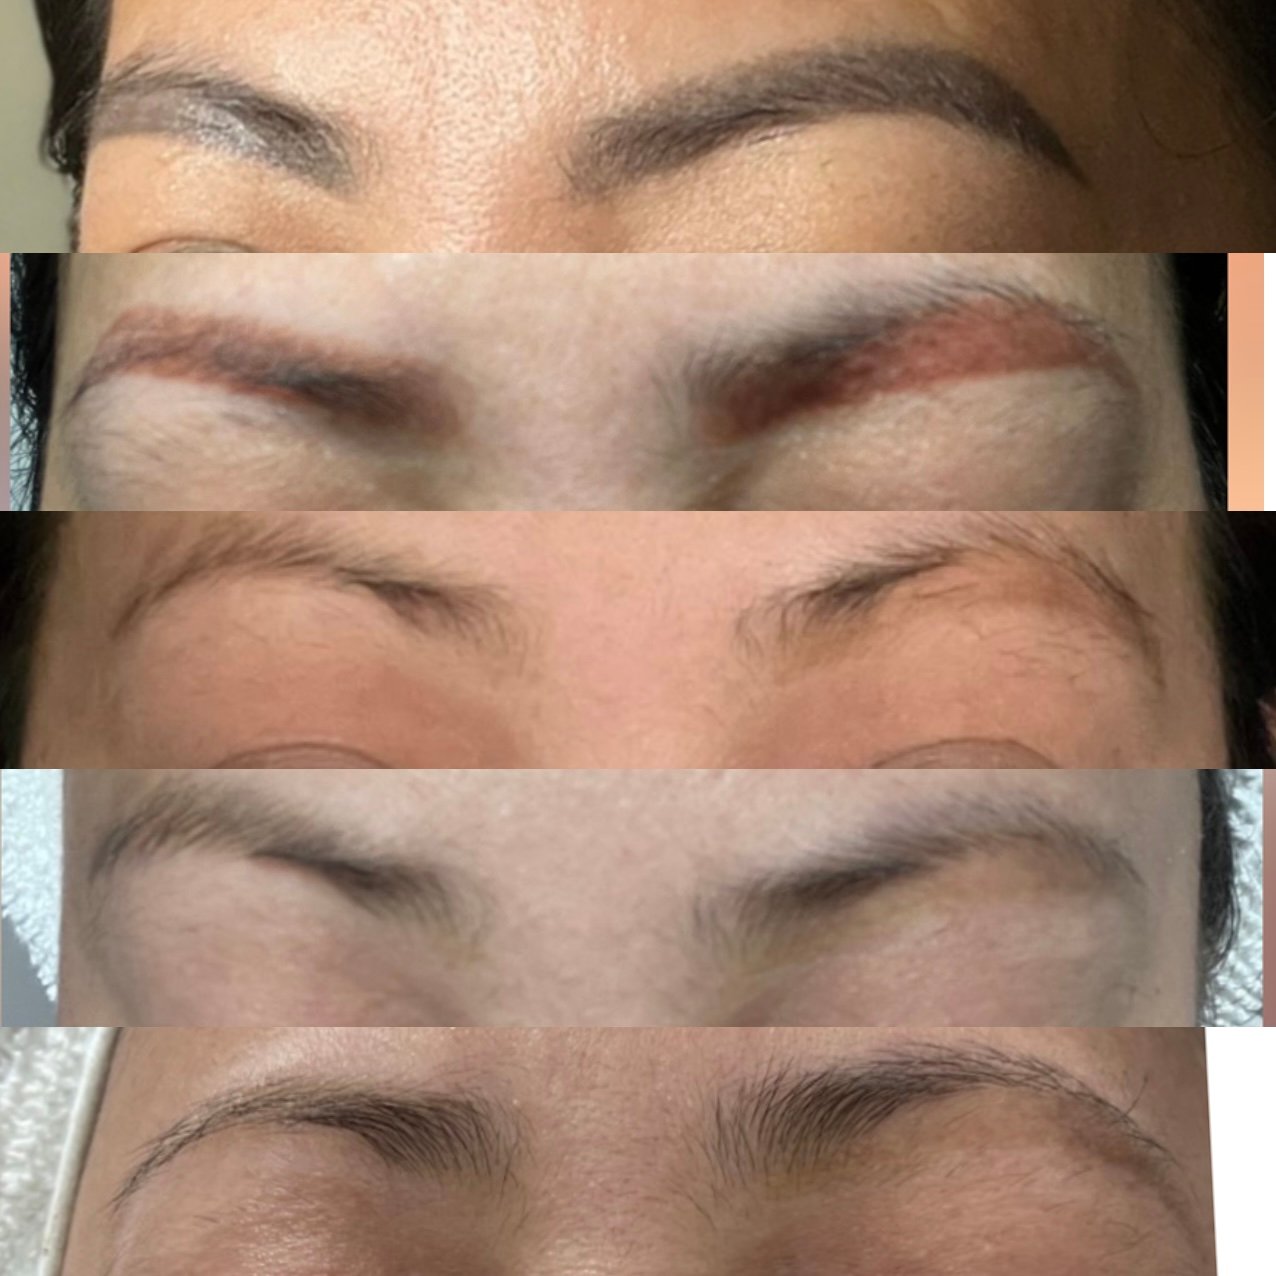
A note on chemical removal pressure: In some cases, the mechanical pressure of saline/chemical removal can leave a temporary mark on the skin — particularly on finer or more sensitive skin. This is something I always assess and discuss in consultation before proceeding. It is always temporary, but worth knowing.
What laser removal actually does to your skin
Laser removal uses a principle called selective photothermolysis — the laser emits a specific wavelength of light that is absorbed by the pigment particles but not by the surrounding skin tissue. The energy heats the particles rapidly, causing them to shatter into much smaller fragments.
These fragments are small enough for macrophages to transport away via the lymphatic system. This is why staying well hydrated between sessions genuinely helps — your lymphatic system needs water to function effectively.
Darker pigments (black, dark brown) — absorb laser energy most efficiently. These respond fastest and require fewer sessions.
Warm pigments (red, orange, yellow) — more resistant to most laser wavelengths. These require more sessions, more patience, and sometimes a combined laser + chemical approach for the best result.
Light/flesh tones — the most stubborn of all. Chemical (saline) removal is often more effective than laser for these, as they absorb very little laser energy.
Removal can be dramatically effective from session one. Here you can see how significantly the density reduces immediately after a single treatment. It is important to understand that the skin will continue to clear for a further 6–8 weeks after each session — the body is still processing and eliminating fragmented pigment during that entire healing period. The result you see at the end of the session is not the final result.
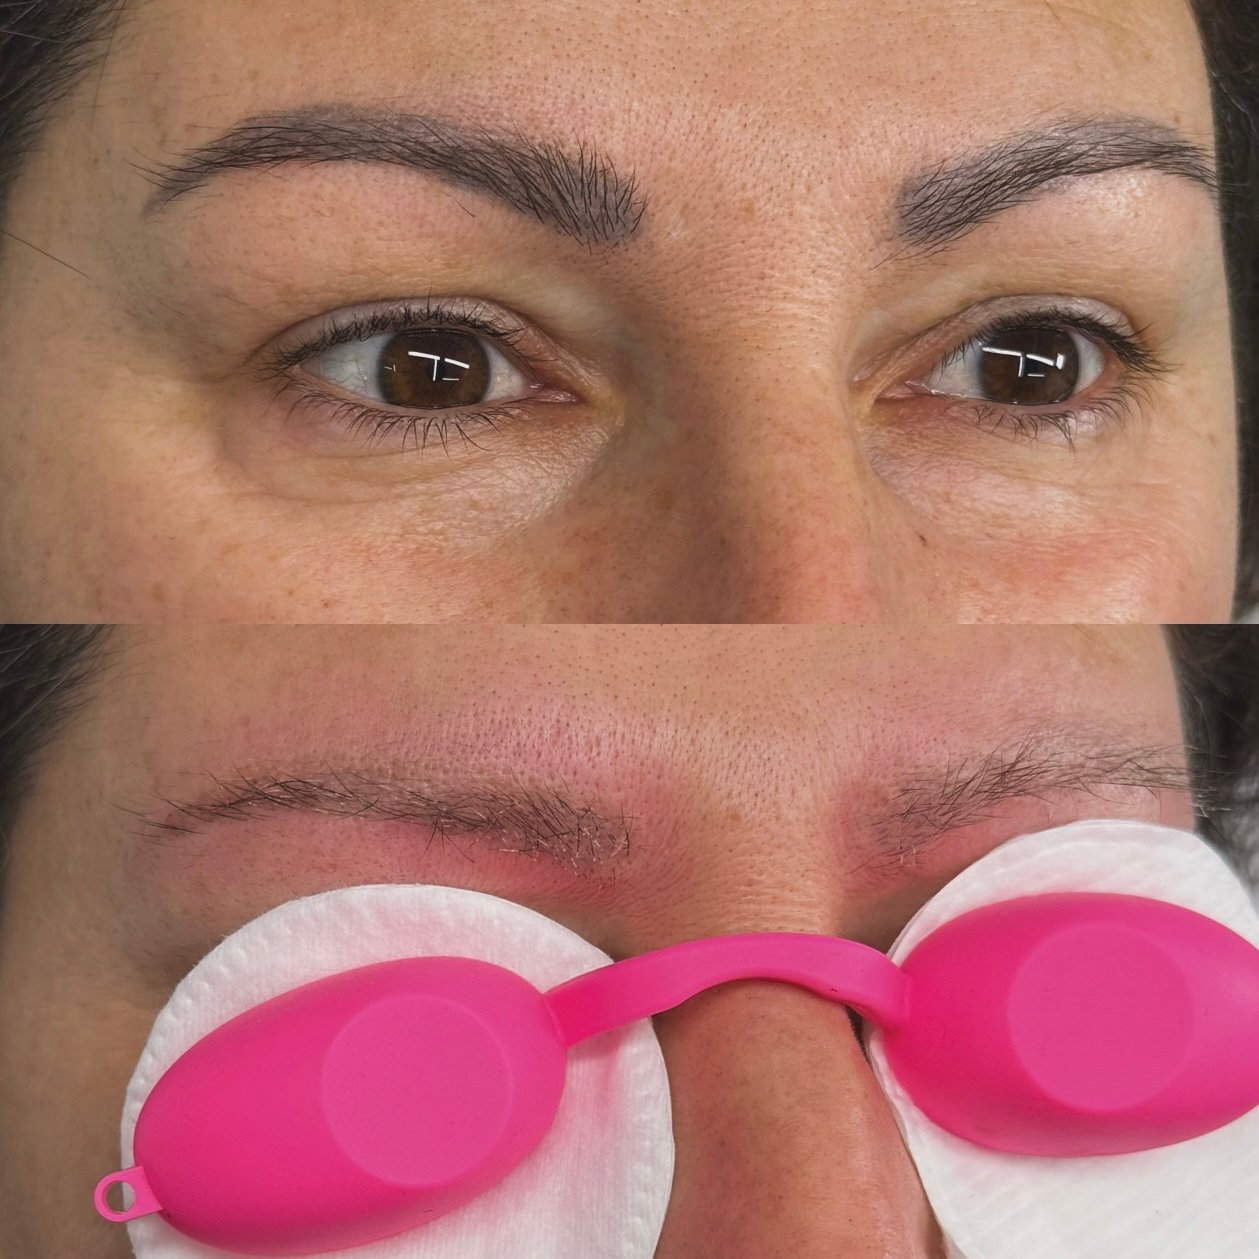
The 6–8 week rule: This is non-negotiable. Sessions must be spaced a minimum of 6–8 weeks apart to allow full skin healing and to give the immune system time to clear as much fragmented pigment as possible before the next treatment. Rushing increases the risk of skin damage and reduces the overall effectiveness of each session.
When colour is not the issue — shape is everything
Colour changes are one reason clients come to me for removal. But the other — and in my experience the more emotionally significant one — is shape. A brow that does not respect the anatomy of your face can alter your natural expression entirely.
Brows sit in direct relationship to your brow bone, the width of your nose, the spacing of your eyes and the natural arc of your facial muscles. When a shape is placed incorrectly — too high, too arched, too angular for the individual face — it can make a client look permanently surprised, angry or simply unlike themselves.
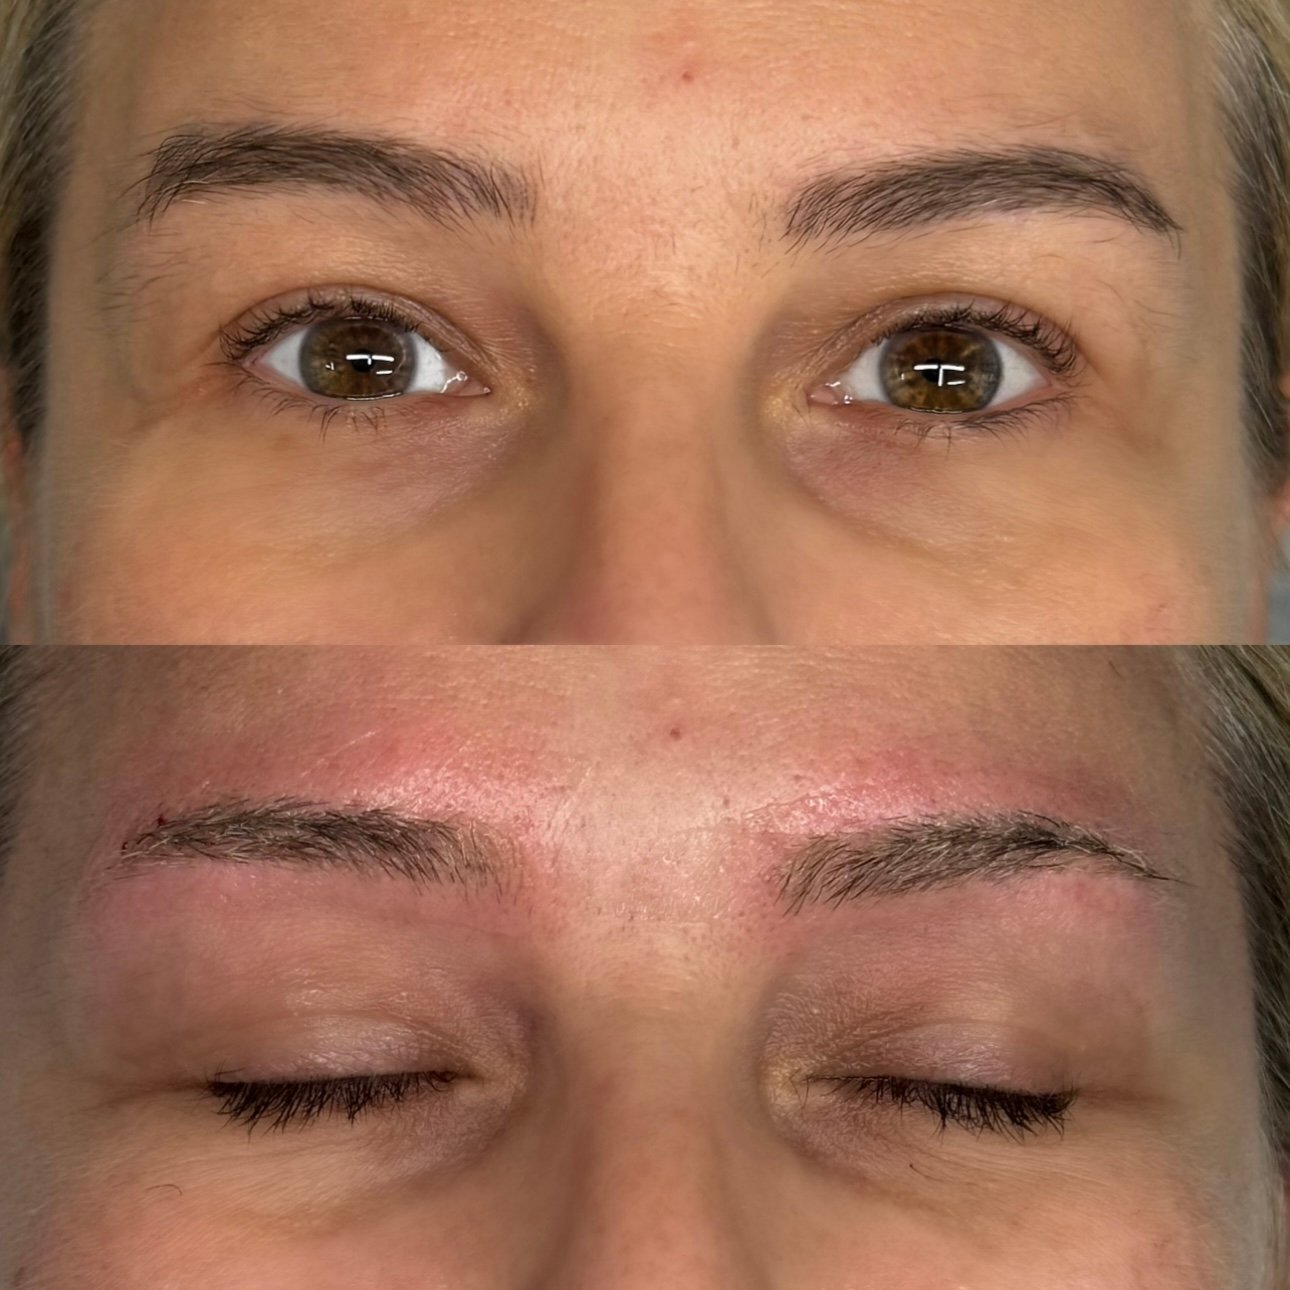
I map every face before I touch it. The measurements matter — the golden ratio, the arch position relative to the iris, the tail length in proportion to the eye. You cannot build a high-end result on top of a poor structure. And you cannot correct a shape problem by adding more pigment. Sometimes the only honest answer is to remove, reset and begin properly.
This is one of the most satisfying cases I have worked on. The original brows had the wrong shape for this client’s face. After one removal session and the correct healing time, we were able to assess what remained and plan a fresh approach — this time powder/ombre shading rather than microblading, which was the right choice for her skin type.
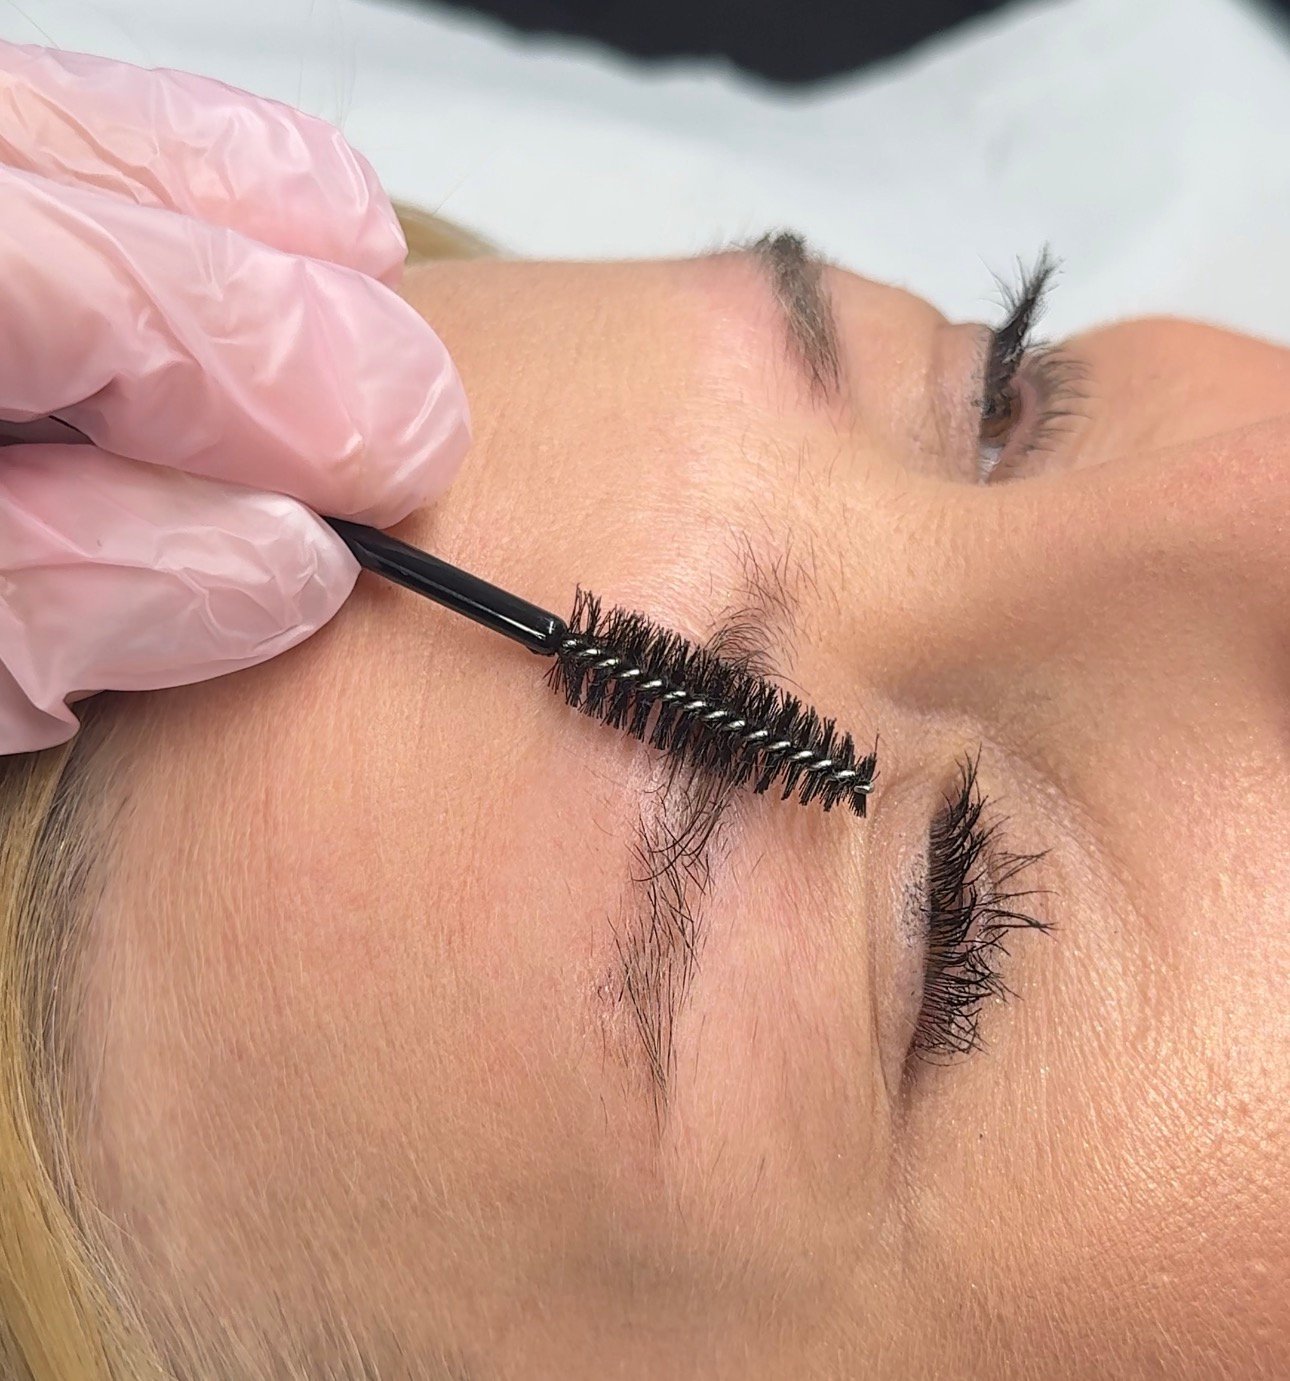
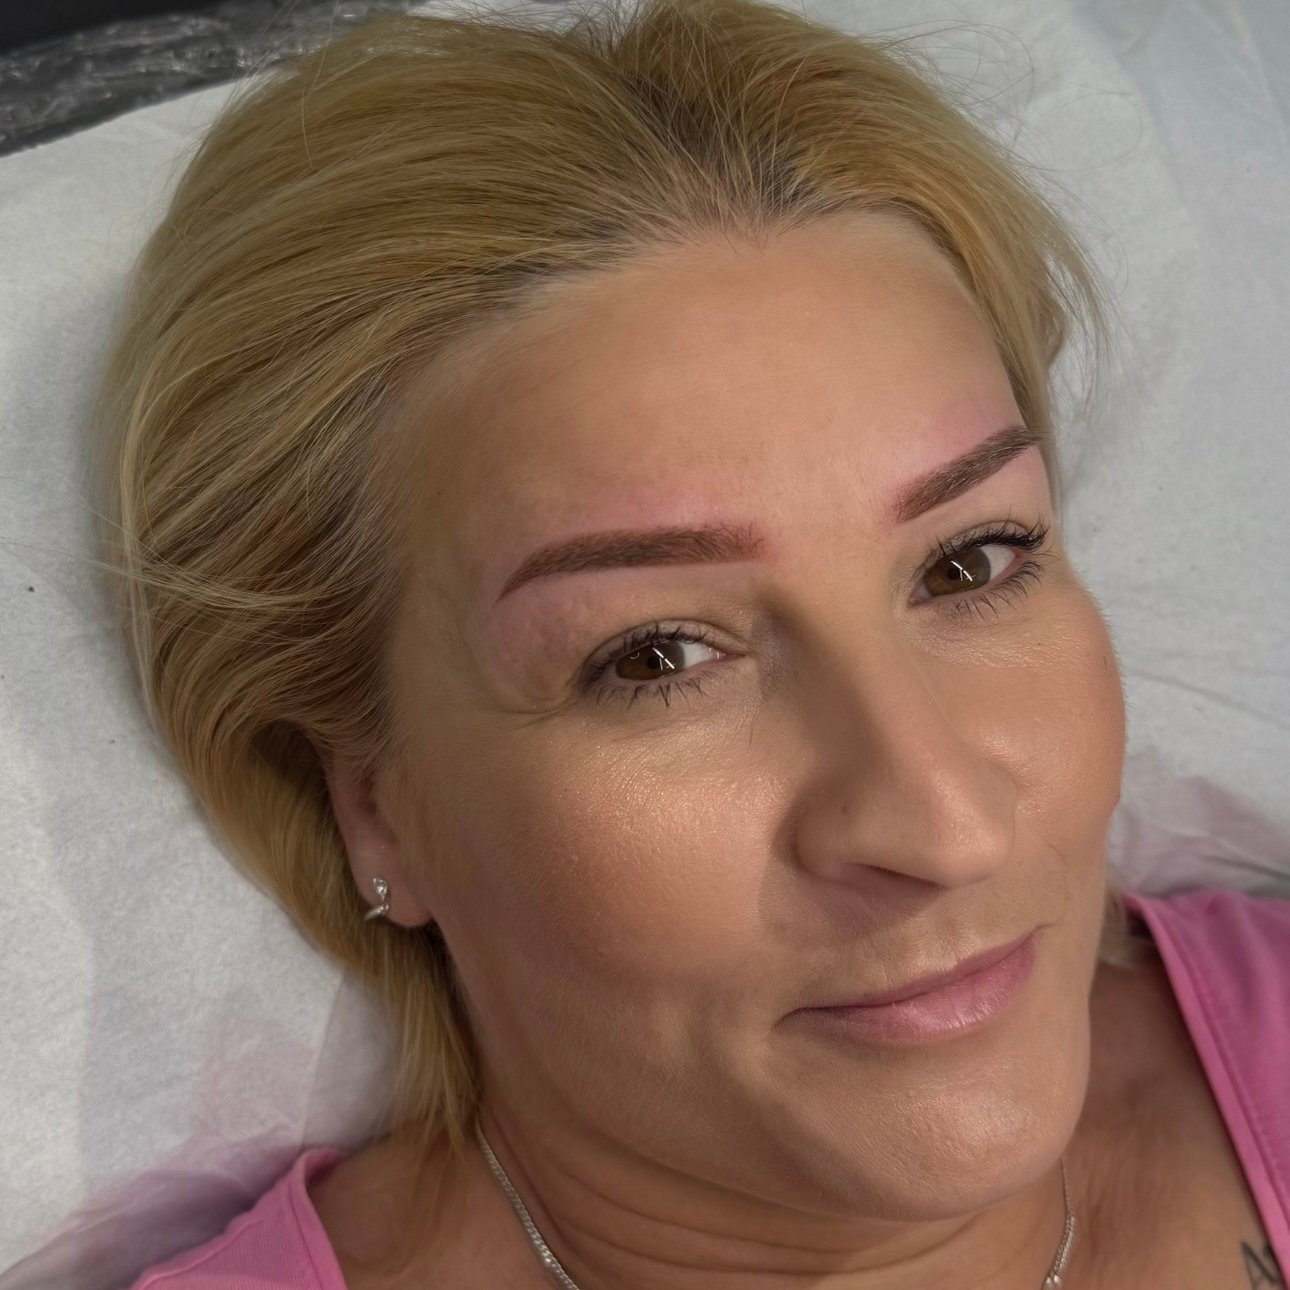
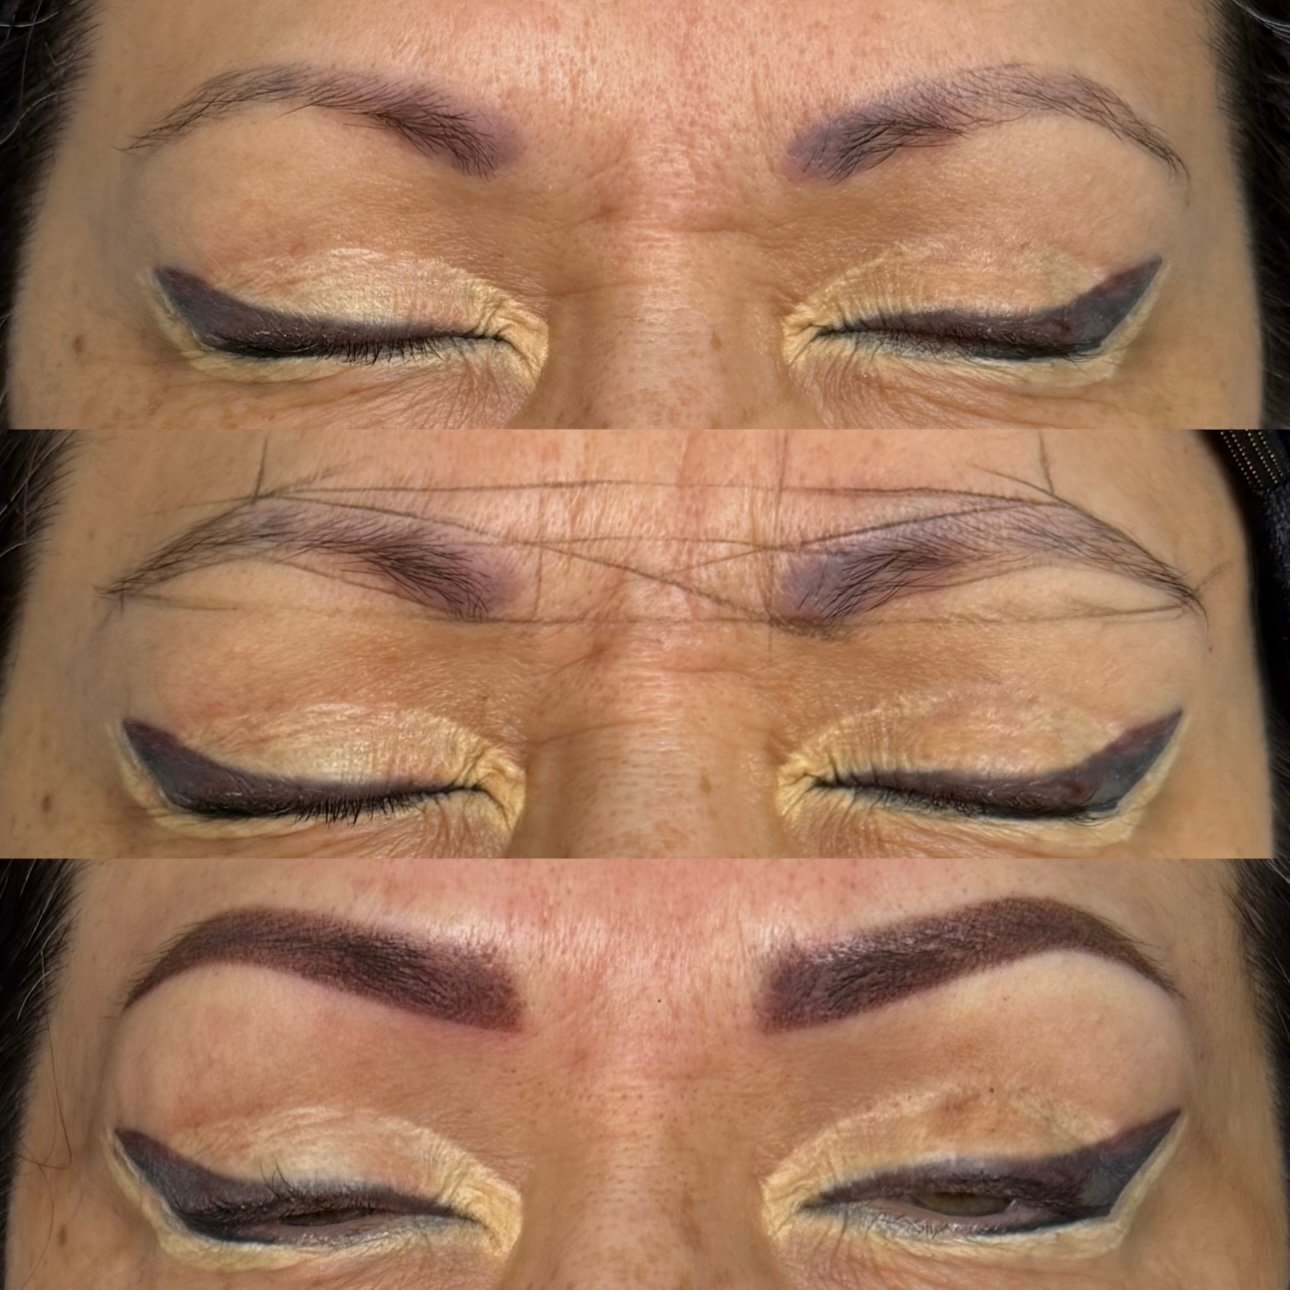
When old tattoo background is still visible: In cases involving deep old-style tattooing, even multiple laser sessions may not fully eliminate the background. In these situations, powder/ombre shading is often the smarter choice — its solid coverage conceals remaining background colour in a way that microblading or nano hair strokes cannot. The client may still see a very faint background in certain lighting — this should always be discussed honestly at consultation.
Remove or refresh — how I decide
Not every case needs full removal. My assessment at consultation looks at pigment density, colour, shape integrity and skin condition. Here is how I think about it:
- Pigment is light and soft with no heavy saturation
- Colour only needs neutralisation — not removal
- Shape is still balanced and suits the face
- Skin is healthy with no overworked tissue
- Client wants a subtle improvement, not a redesign
- Pigment is too saturated or heavily layered
- Colour has shifted to grey, blue, red or orange
- Shape is incorrect or no longer suits the face
- Skin looks heavy, overworked or congested
- Client wants a complete redesign
- Too many previous touch-ups — layering the problem
Inflammation after removal — what to know
Some clients experience mild inflammation after a laser session. This is a normal immune response — the body is reacting to the energy applied and beginning the process of clearing fragmented pigment. It is not always the case, but it is always possible.
Both from clinical guidance and from years of experience with my own clients, the most effective approach is to act early. At the first signs of swelling — antihistamines and ice. Do not wait for inflammation to escalate. Your face will show you the signs — around the eyes particularly. If you act immediately, in the vast majority of cases you will control the outcome completely. If you leave it, it may take up to 4 days to settle. The moment you notice, that is the moment to act.
Important for darker skin tones: Laser energy is absorbed by melanin as well as pigment. On darker skin tones, there is a genuine risk of post-inflammatory hyperpigmentation — temporary or, in rare cases, longer-lasting darkening of the treated area. This is why proper consultation is essential before any laser removal, and why I always adapt energy levels carefully to the individual’s skin tone.
Aftercare — this is where the result is protected
The session is my work. What happens in the following days is yours — and it matters enormously for how cleanly your skin heals and how effectively the pigment clears.
- Keep the area clean and dry
- Apply aloe vera gel, Sudocrem or a fragrance-free soothing cream
- Take antihistamines and use ice at the very first sign of inflammation
- Stay well hydrated — your lymphatic system needs water to clear pigment
- Wear SPF50 once the skin has settled
- Picking, scratching or touching the area
- Sun exposure or tanning
- Makeup directly over the treated skin
- Gym, sauna or anything that causes sweating (48 hours)
- Hot baths or swimming (72 hours)
- Oils in the first days — the skin needs to breathe
What to expect — session by session
Laser removal is a process. Here is an honest, realistic timeline for most PMU brow removal cases:
My approach to laser — and what I will always tell you honestly
There are many laser devices on the market — and results vary enormously depending on the operator, not just the machine. I achieve excellent results in a single session by reading the skin carefully and adapting energy levels and wavelengths to the specific colours and pigment depth in front of me. Understanding how different pigments respond to different wavelengths is what separates effective treatment from ineffective treatment.
That said, honesty matters more to me than promising you something I cannot guarantee:
I cannot guarantee how many sessions you will need. I cannot guarantee that total removal is possible with laser alone. Every skin is different. Every pigment is different. Every case is assessed individually. What I can promise is that I will give you my honest assessment at every stage — and never push you into unnecessary sessions.
- Dark pigments — black and dark brown
- Heavily saturated PMU brows
- Large coverage areas needing rapid reduction
- Shifting unwanted colours (grey, blue)
- Bright colours — red, yellow and orange are stubborn
- Very light or flesh-toned pigments
- Eyeliner removal — too close to the eye, I do not offer this
- Dark skin tones — hyperpigmentation risk, always assessed in consultation
Two things I do not offer: Eyeliner removal and laser on very dark skin tones where hyperpigmentation risk is high. These are not limitations I apologise for — they are clinical decisions that protect my clients. Your safety always comes first.
Lip pigments behave differently to brow pigments. After healing, some lip blush colours undergo a degree of light oxidation — this can cause the colour to temporarily appear darker or slightly different in tone before settling. In cases where this oxidation has shifted the colour noticeably, we can target this with laser — making it a useful corrective tool as well as a removal one. This is something I assess individually at consultation.
Laser vs saline removal — two completely different methods
Both laser and saline (chemical) removal require the same minimum waiting time between sessions — 6–8 weeks — to allow full skin healing. But how they work is entirely different.
One of the most powerful tools available in PMU is emergency removal — using saline solution within 24–48 hours of a fresh tattoo that has gone wrong. At this point, the pigment has not yet fully settled into the deeper dermis, which means saline removal can lift 80–95% of the ink in a single session. This is genuinely one of the most effective procedures in PMU correction.
This client was unhappy with her brows immediately after treatment done elsewhere. She contacted me within the timeframe and we were able to act quickly. The results speak for themselves.
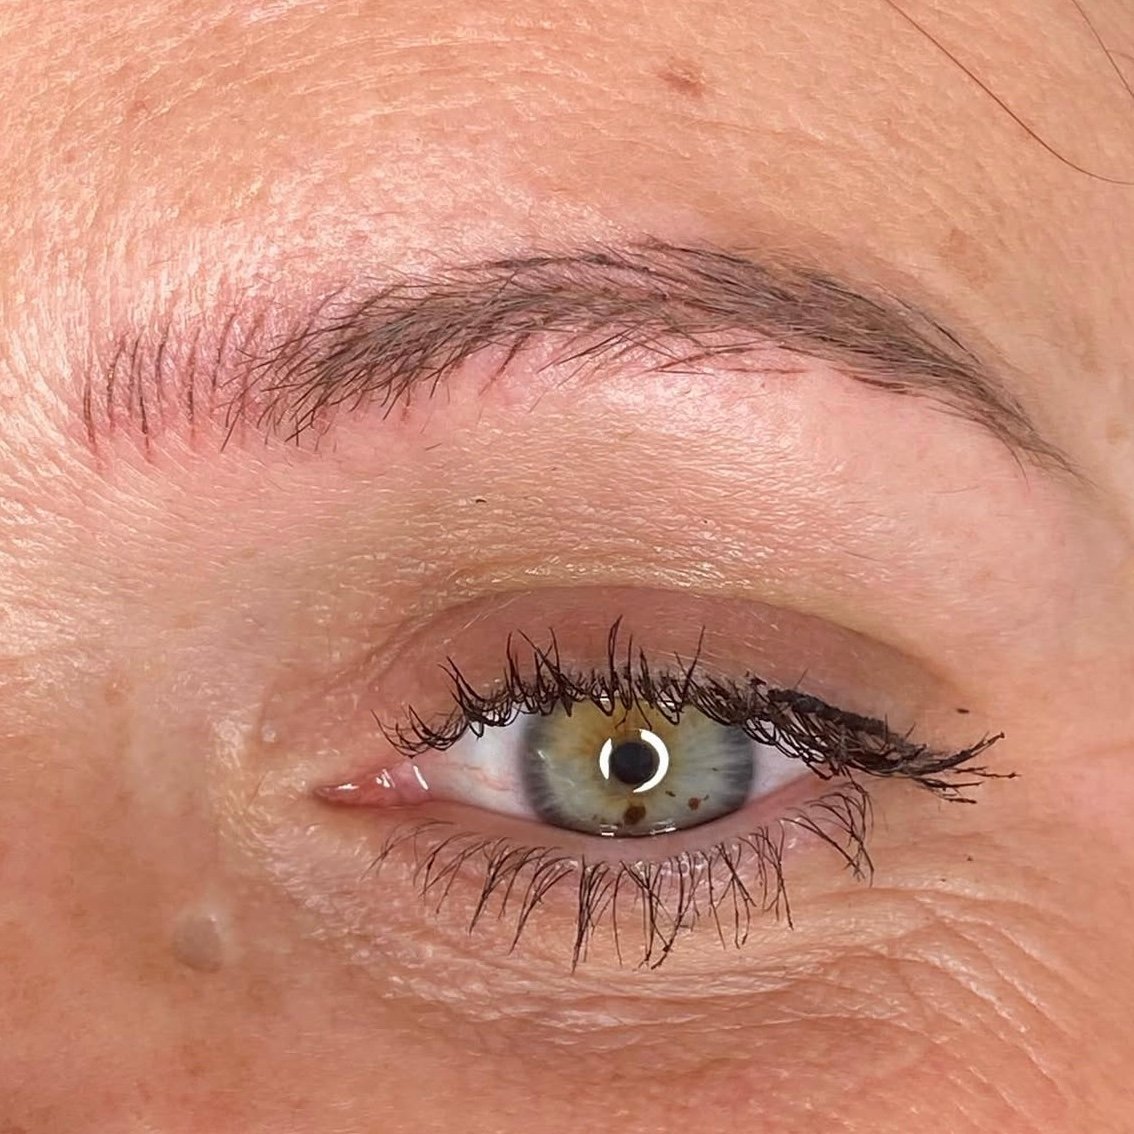
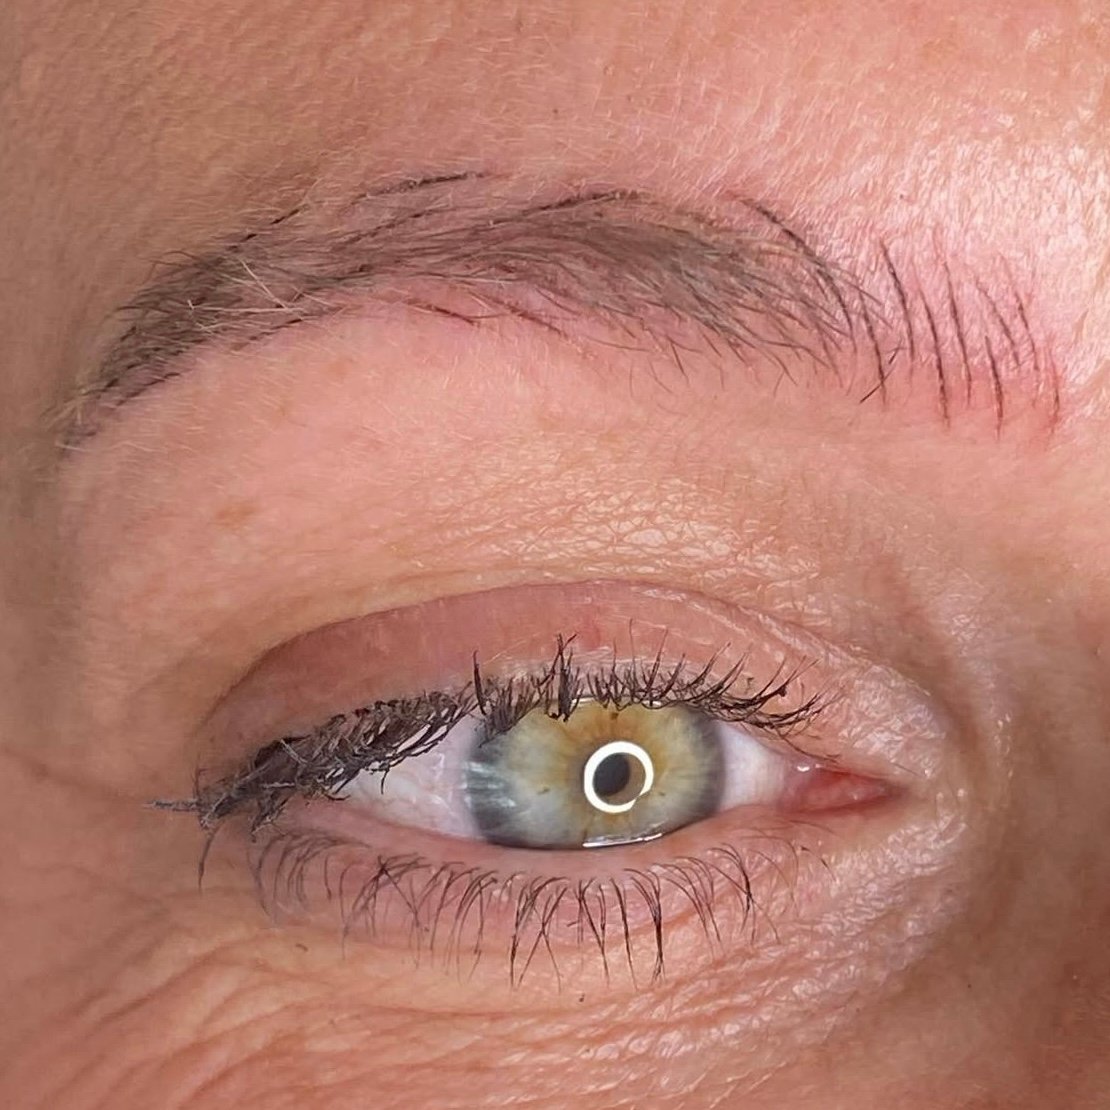
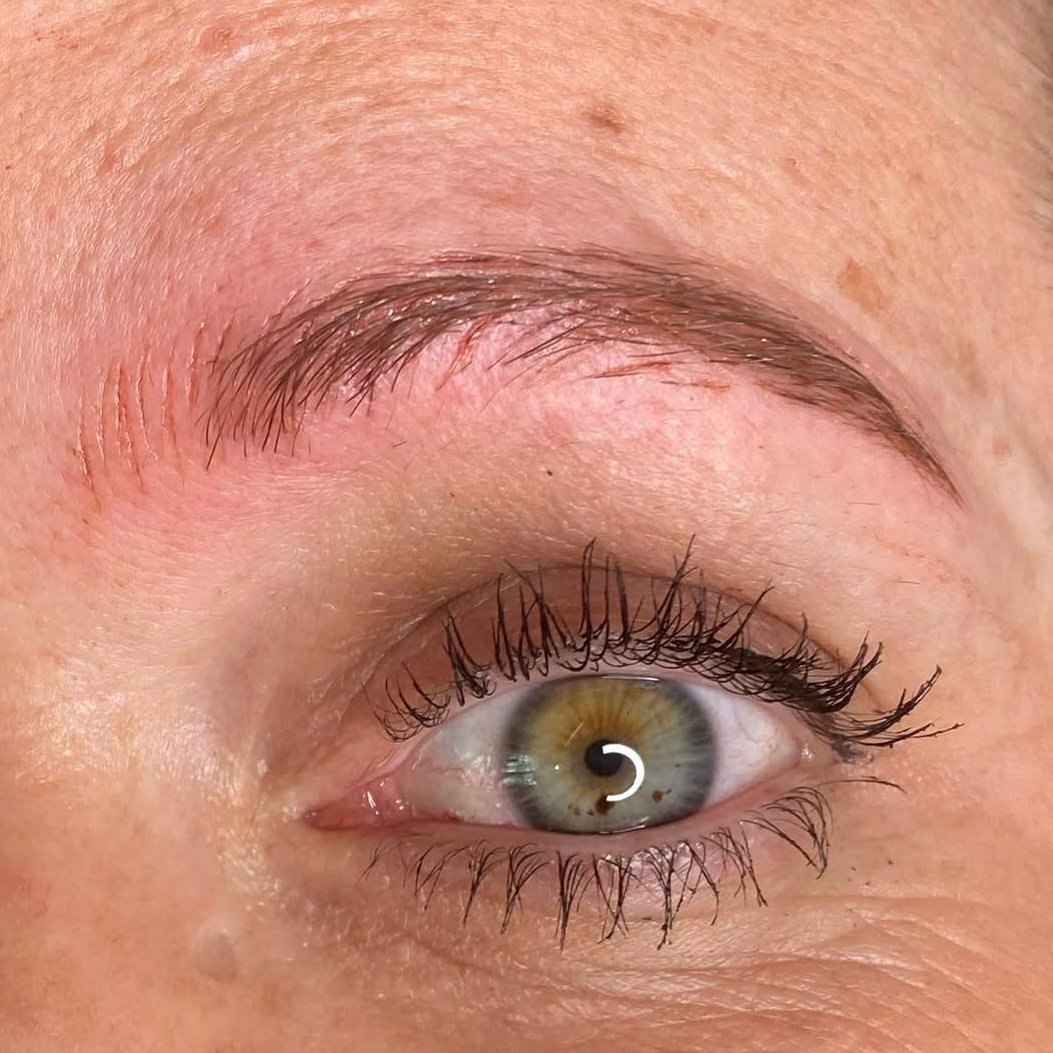
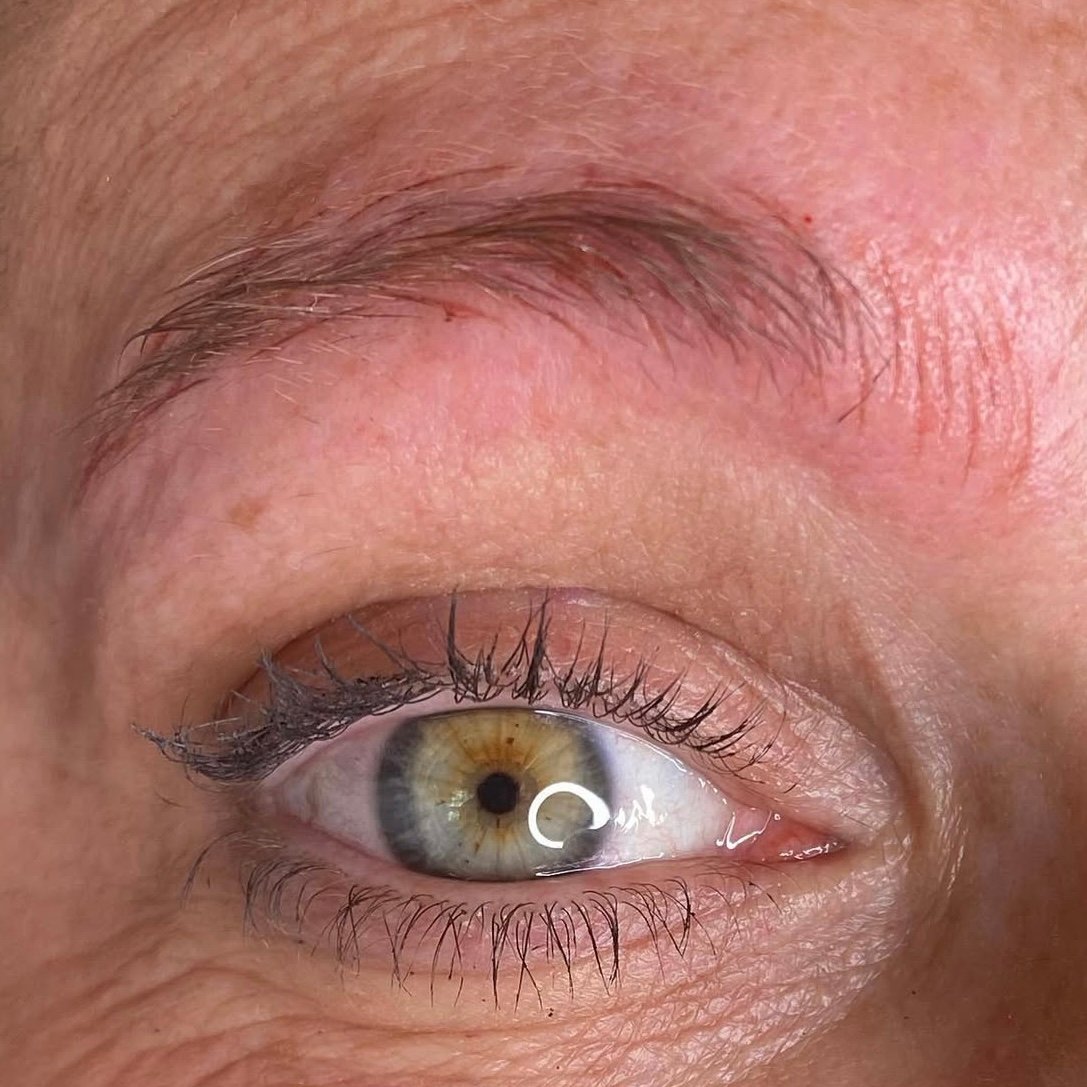
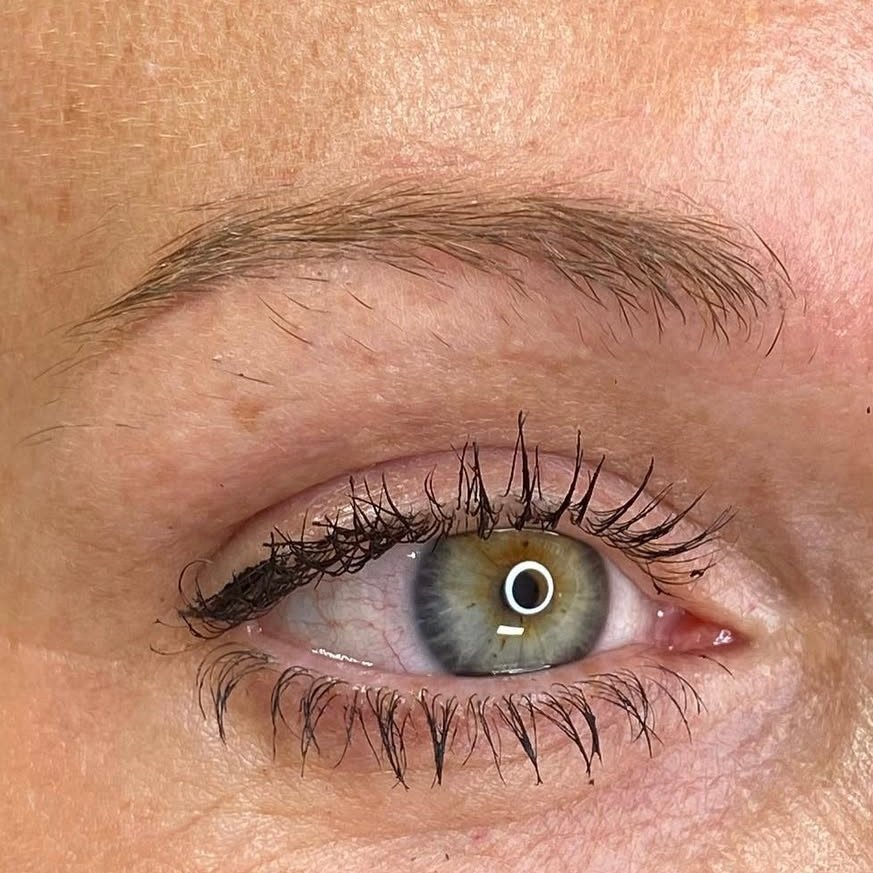
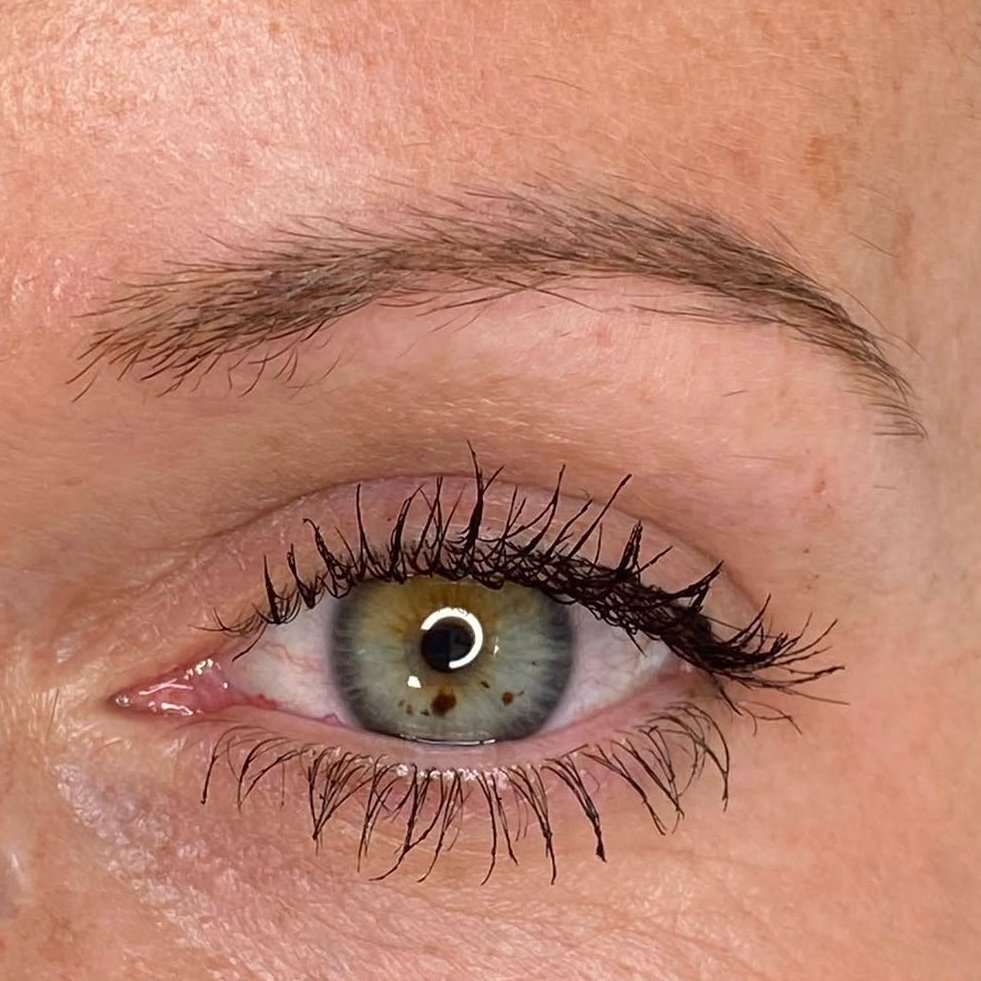
A note on marks and scarring: In some cases — particularly with emergency removal or multiple sessions — faint marks or temporary texture changes can remain on the skin. This is a known possibility and something I always discuss honestly before proceeding. With targeted treatments such as microneedling, these marks can be significantly faded over time. It is rare, but it is real — and you deserve to know.
If you have had PMU done and are unhappy with the result — contact a removal specialist immediately. The 24–48 hour window is when saline removal is at its most powerful. Once the pigment fully settles into the dermis (usually after 72 hours), the process becomes significantly longer. Time genuinely matters here. Do not wait.
Not sure what your brows need?
Send me a photo on WhatsApp. I will give you an honest assessment — remove, refresh or leave — before you commit to anything.
Send me a photo — WhatsApp